How To Change Your Phone Screen?(For DIY)
September 17,2012
From: ABCsources
-
\r\n
Preparation section:
\r\n\r\nPrepare the need to change the screen, back cover and the tools. We need a clean place for some internal parts are small, and you’d better prepare a box to put them in it to avoid missing them.
\r\n\r\n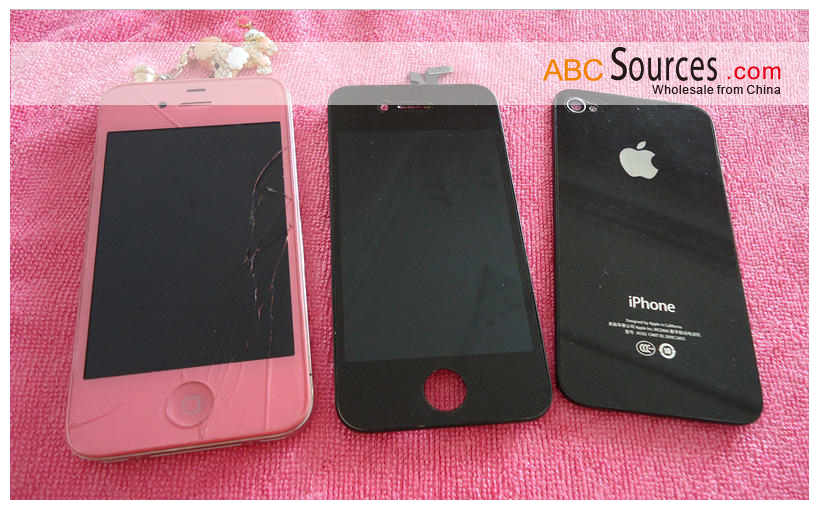 \r\n
\r\n
\r\n\r\n\r\nPreparing tool: phillips screwdriver, pry bars, pry tablet, sucker
\r\n\r\n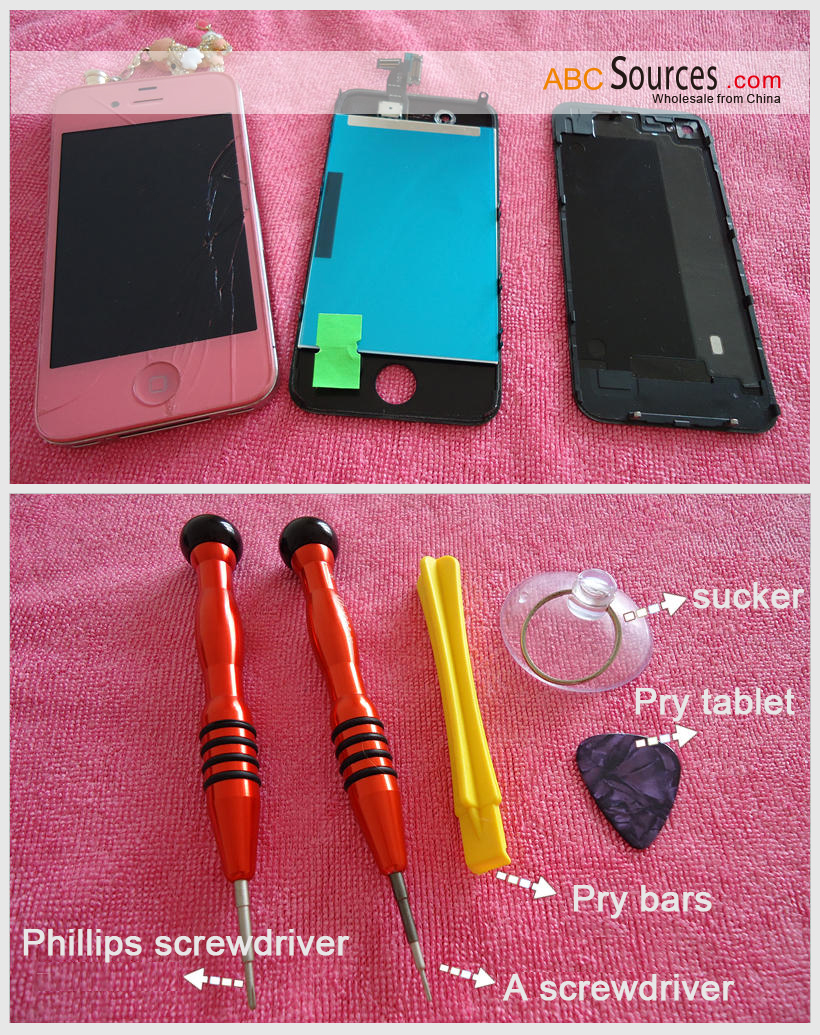 \r\n\r\n
\r\n\r\n
Turn off the phone and put the card slot off.
\r\n\r\n
\r\n\r\n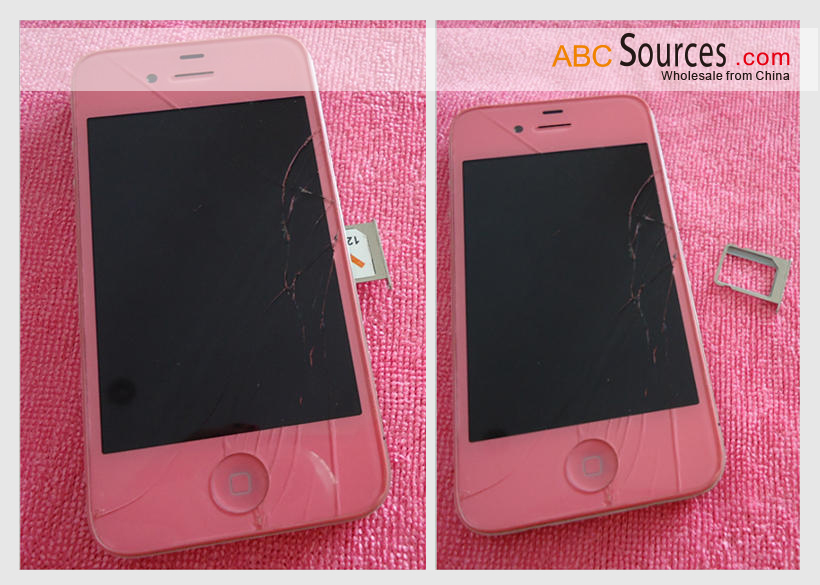 \r\n\r\n\r\n
Twist off two screws under the bottom.
\r\nGently push the back cover of the iphone and later you can see the internal mobile phone
\r\n
\r\n\r\n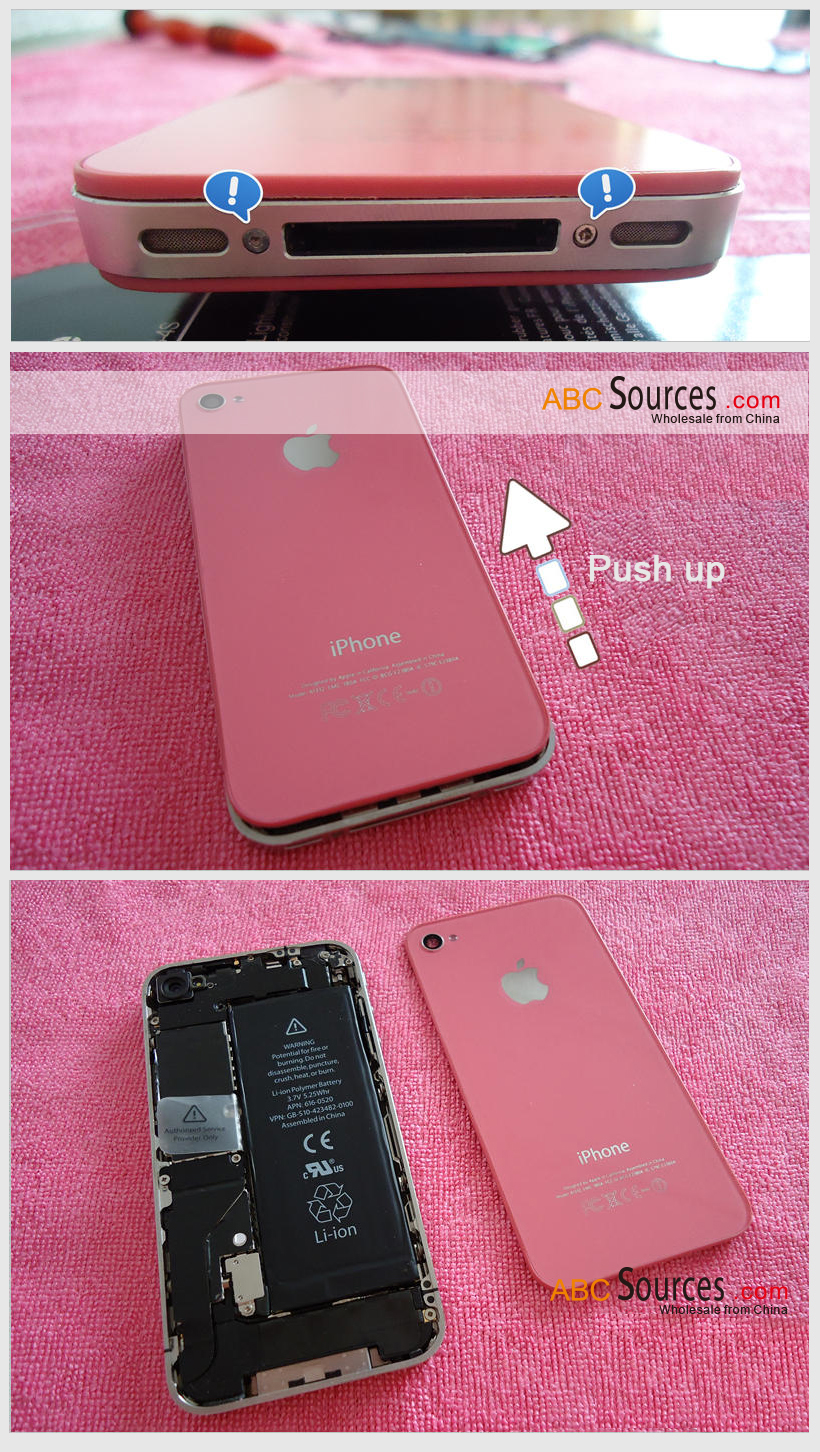
\r\n\r\n\r\n
\r\nTwist off the fixed cell row line of the screw.
\r\nPry the battery line with a small tweezers.
\r\n\r\n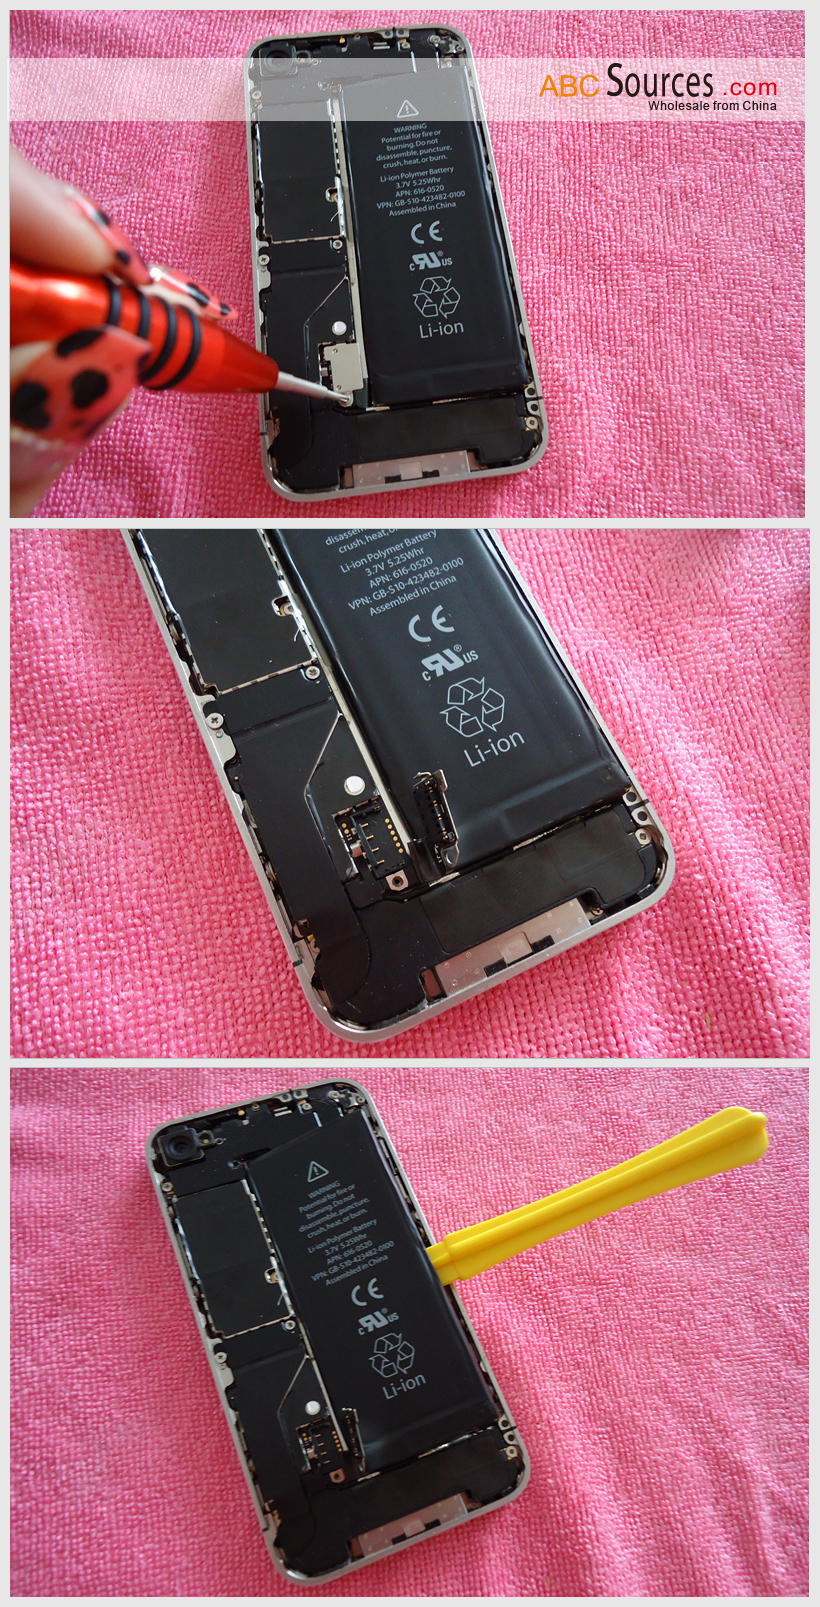 \r\n\r\n\r\n
Take down small isolation pieces.
\r\nTake off the joint between the speakers and microphone for the joint part is small so I suggest you use the tweezers.
\r\n
\r\n
\r\n\r\n
\r\nTwist off the left fixed data line of the two screws. Use the pry bars gently to exhaust line.
\r\nThere are 8 screws in the mobile phone and take them off.
\r\n\r\n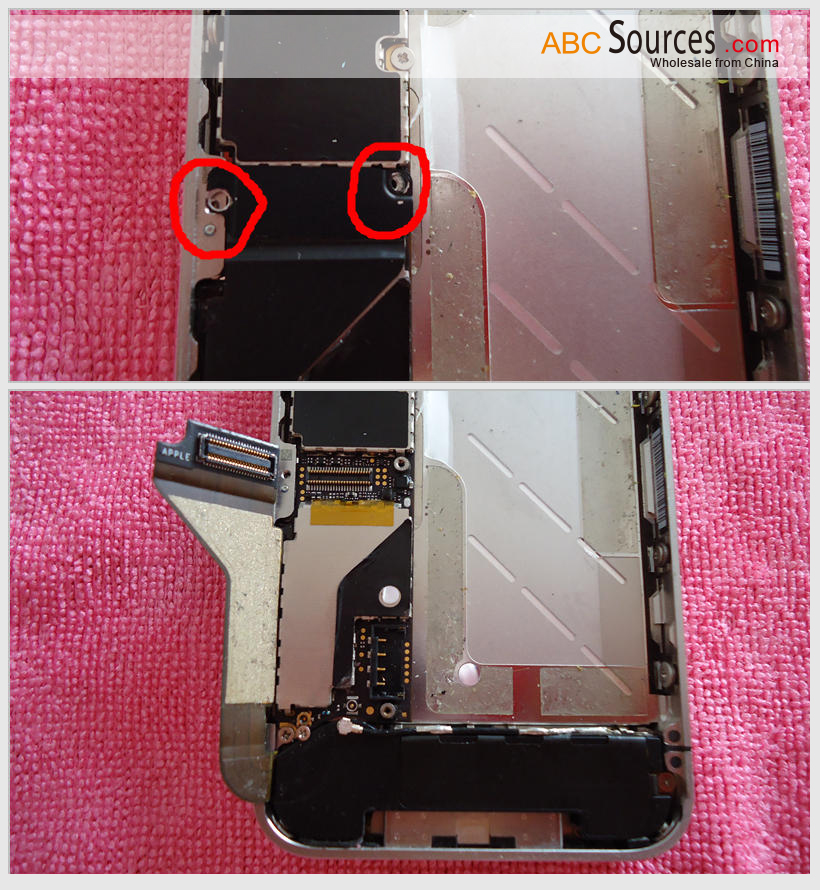
\r\n
\r\n\r\n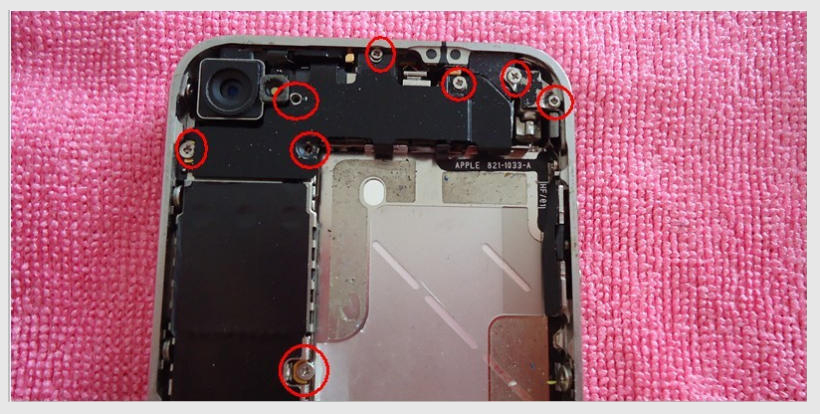 \r\n\r\n\r\n
Take off the isolation part and take care of the wifi part.
\r\n\r\n
\r\n\r\n\r\n\r\nRemove the miniature vibrator.
\r\n\r\n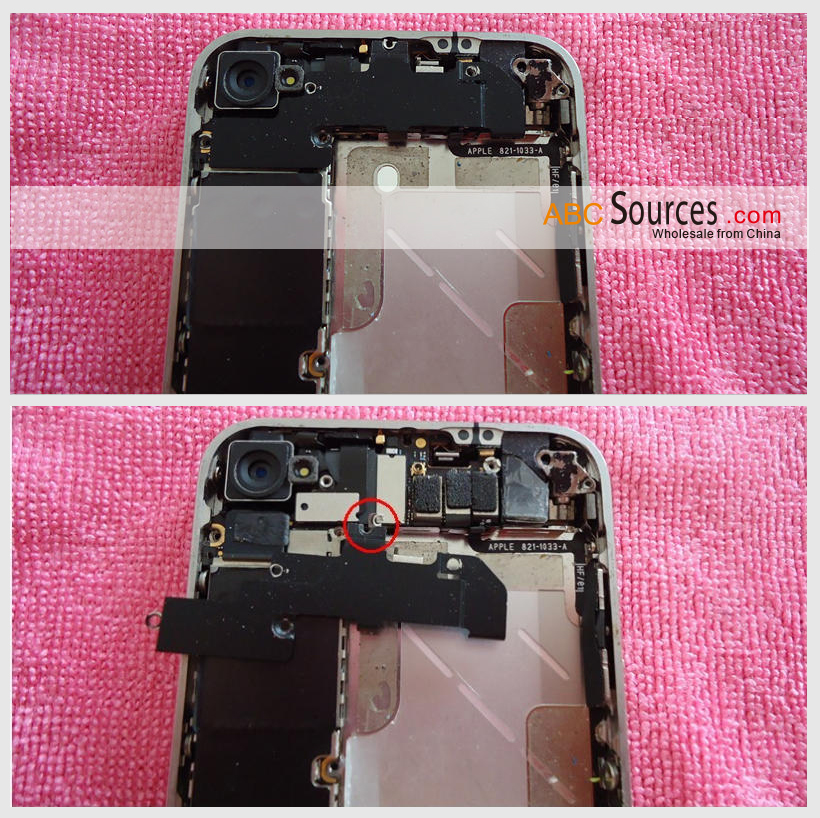 \r\n\r\n\r\n
Take care the exhaust line and behind it there is a screw to fix the main board. Remove the screw we can easily take off the main board. Otherwise, we need to take the camera part.
\r\n\r\n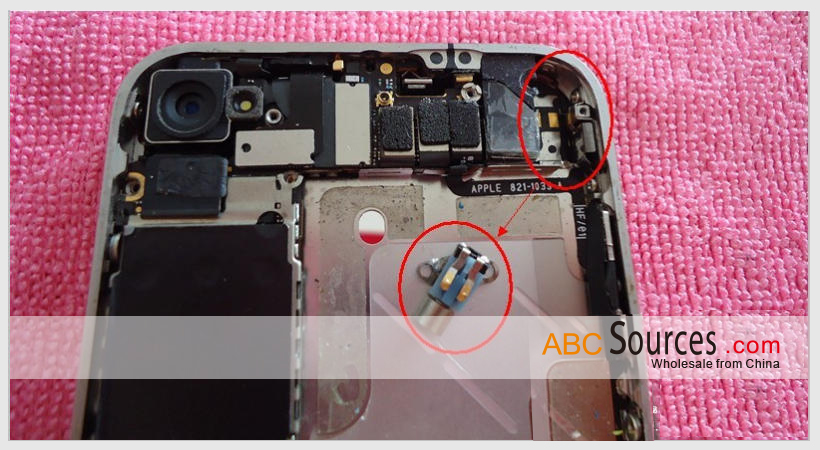 \r\n\r\n
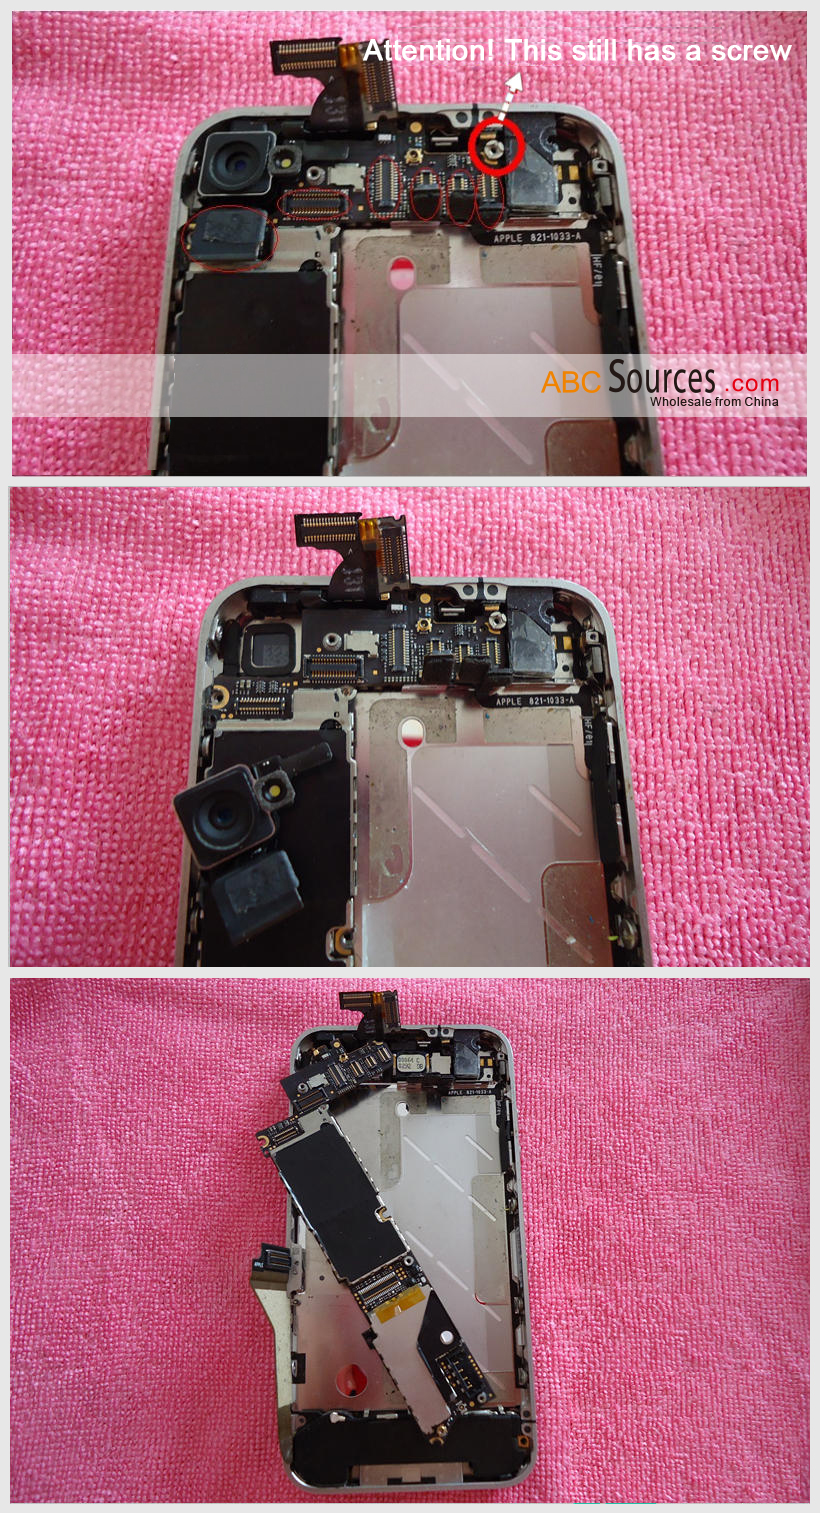 \r\n\r\n
\r\n
The microphone and audio output module: Twist off the both part of the screw and microphone and audio output module can easily be taken off.
\r\n\r\n\r\n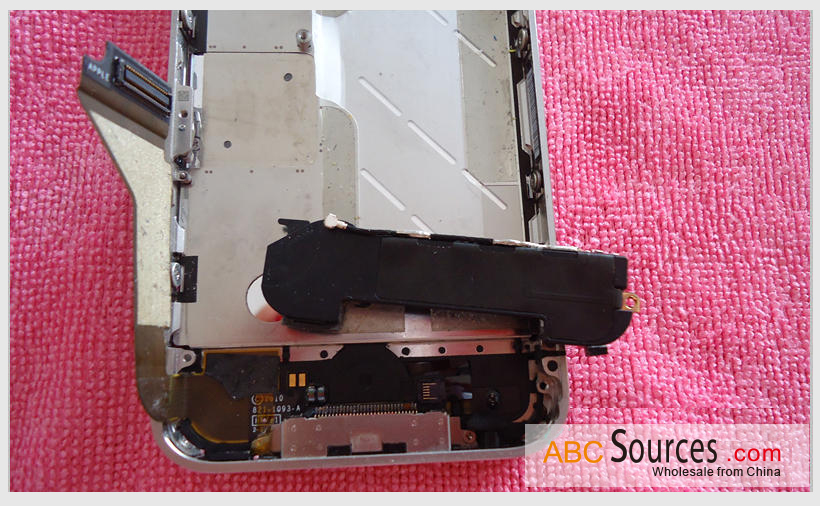 \r\n
\r\nThere is whole internal structure picture.
\r\n\r\n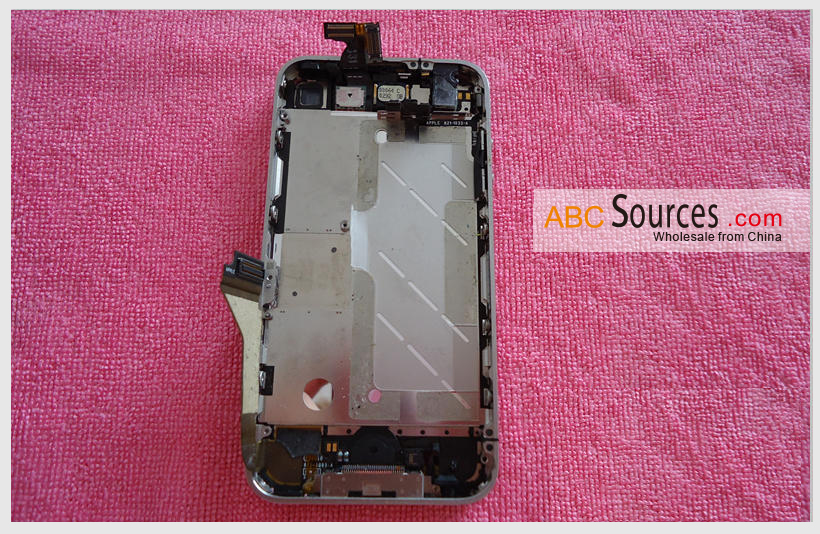 \r\n\r\n\r\n\r\n\r\n\r\n\r\n
\r\n
Remove the 10 screws which fix the screen.
\r\n\r\n\r\n\r\n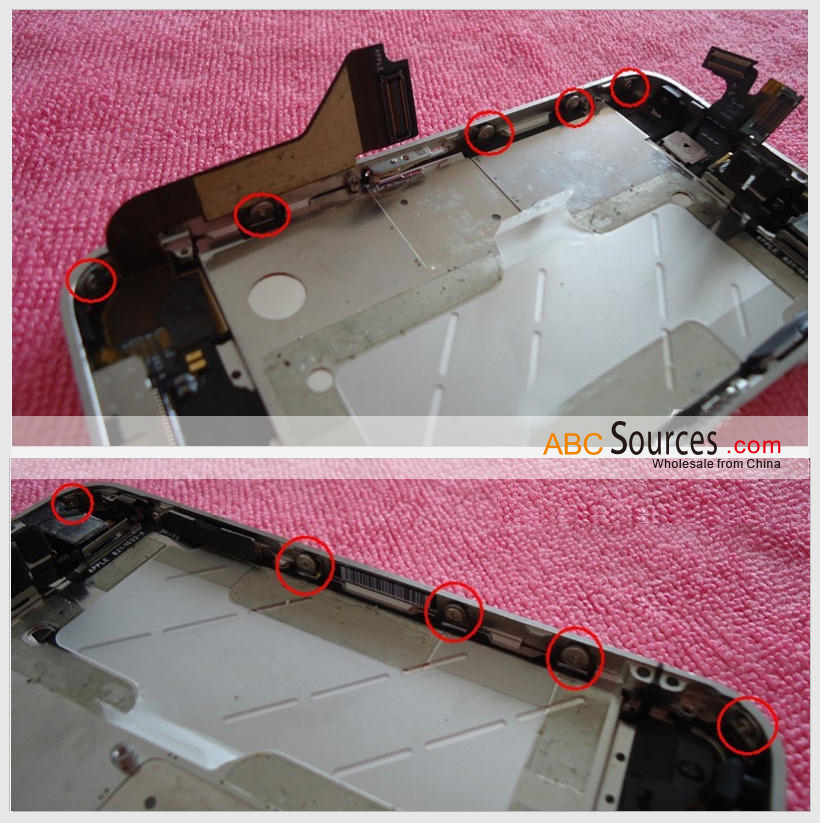
\r\n
Take care of the camera.
\r\n\r\nIn the red circle is the screen display and touch exhaust line.
\r\n\r\n
\r\n\r\n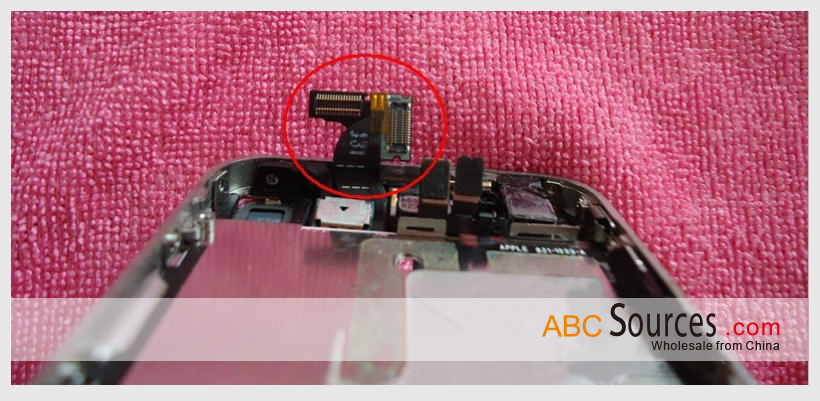 \r\n
\r\n
\r\n\r\n
\r\n\r\n\r\n
Use the pry tablet to separate the body and the screen slowly, and then use the sucker to finish it.
\r\nPs: We suggest that to separate it from button.
\r\n
\r\n\r\n \r\n\r\n\r\n
\r\n
After removing the line between the screen and body, the whole steps are finished.
\r\n\r\n\r\n
\r\n\r\n \r\n
\r\n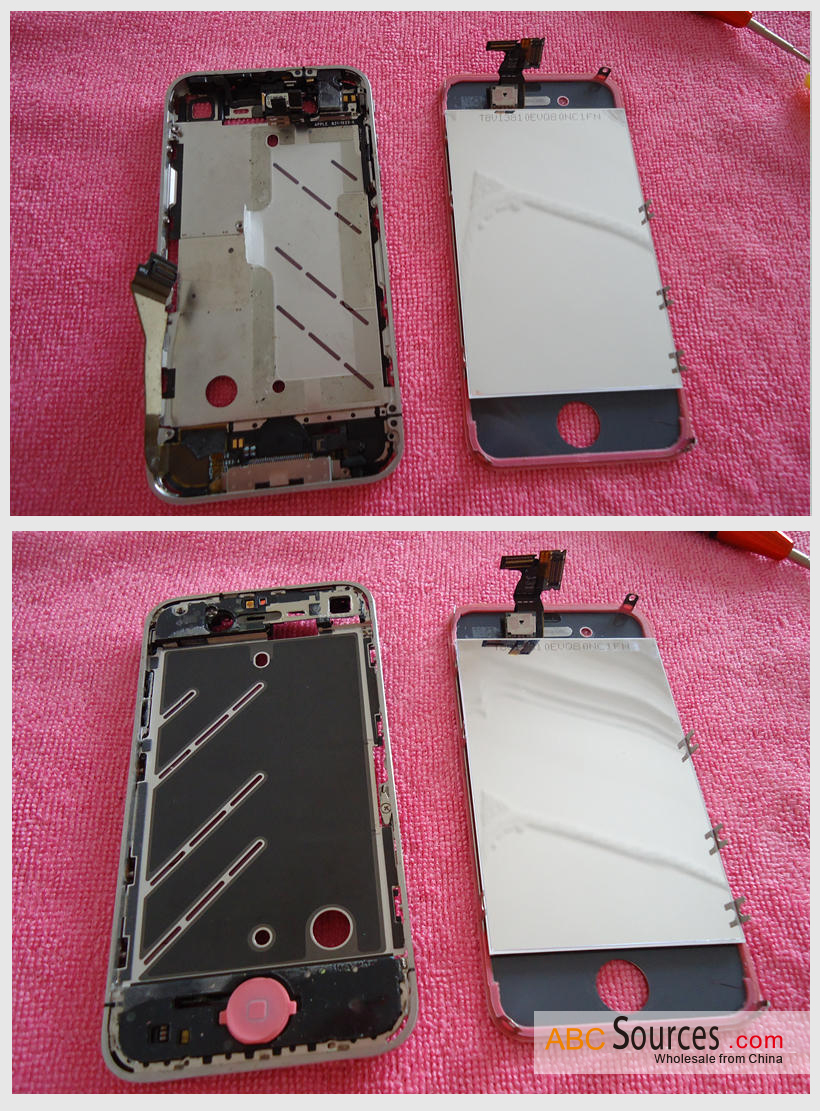 \r\n\r\n\r\n
To fix on the new line and all small parts as well as screws put on.
\r\n\r\n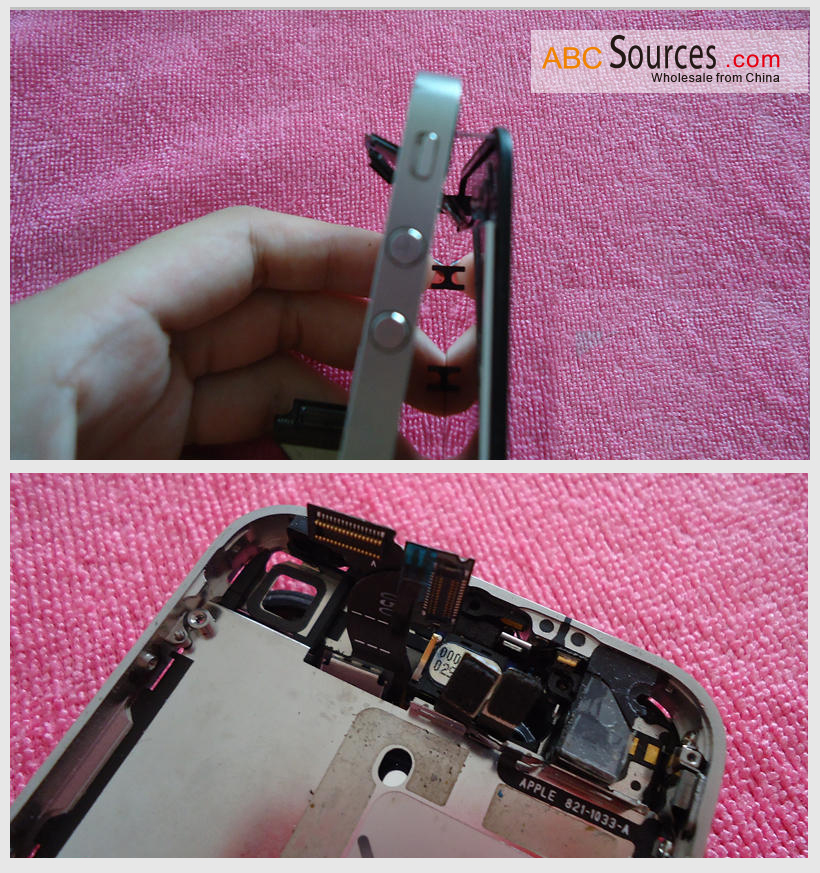
Finished picture.
\r\n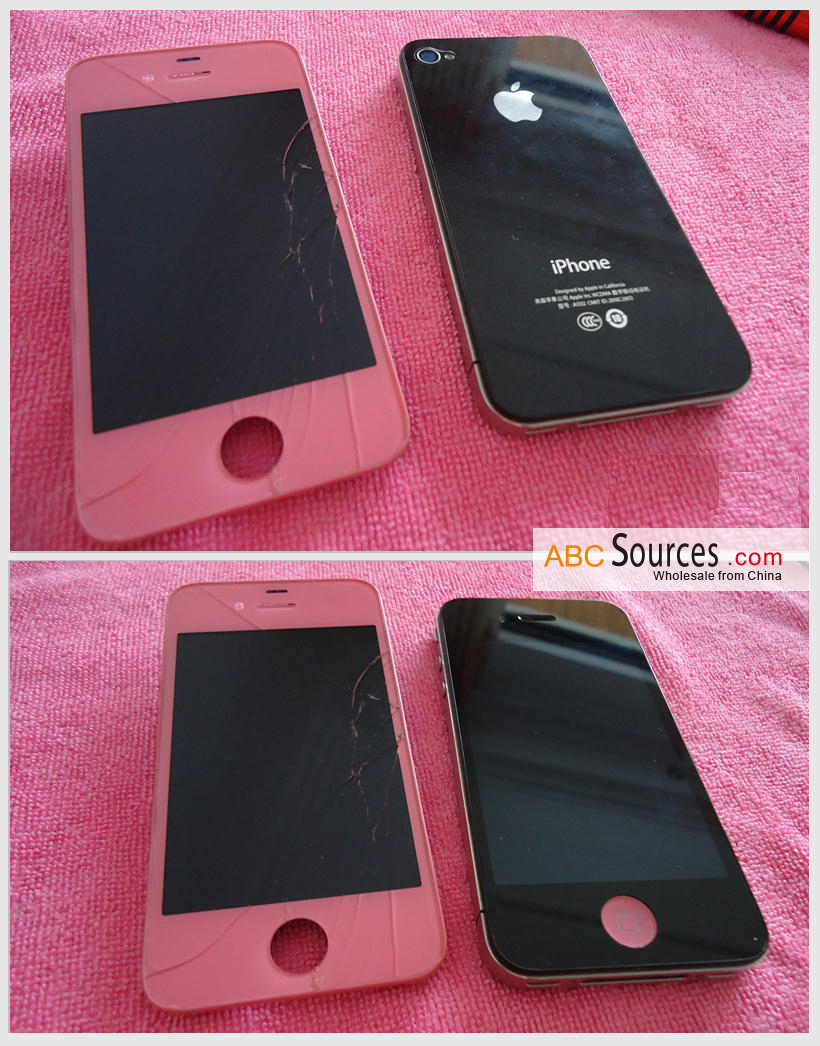
- PREV:Romantic In The Cups
- NEXT:Ways To Wear Scarfs (1)
Related Articles